Wednesday, December 21, 2011

'Tis The Season

After I wrote the post about DIY holiday food gifts, I felt lazy and decided I would make time to make some of my own gifts this year.  So here's what I came up with:

Chocolate Spoons

These are very easy to make and can be used with coffee or hot milk to make hot chocolate.  
You will need:
Plastic spoons; I bought mine at the dollar store, don't spend a lot of money on spoons
chocolate; I buy the chocolate from the candy make supply aisle at the craft store, it melts really well
sprinkles for decorating

Get Started:
1.  Melt the chocolate in the microwave according to directions on chocolate bag.  
2.  Lay out the plastic spoons on a tray lined with wax paper.  
3.  Spoon the melted chocolate into the plastic spoons. 
4.  Add the sprinkles for decorations, then place in fridge to set, about 15 minutes.  
5.  That's it, enjoy!  


Chocolate Peanut Butter Cornflake Cookies
There are no bake cookies and are super easy to do.  

Ingredients: 
cornflakes 
chocolate, candy making chocolate from craft store
peanut butter
sprinkles for decorating

Start Cooking:
1.  Melt chocolate and peanut butter in the microwave.  Stir in cornflakes, until they are well coated.  
2.  Spoon onto a tray lined with wax paper.  Decorate with the sprinkles and put in the fridge to set up, about 15 minutes.  
3.  Eat and enjoy! 

Enjoy!  


Sunday, December 18, 2011

DIY Holiday Food Gifts

First off, sorry for the lack of posts the past week.  With the Christmas holiday coming up, I have been very busy.  I am also moving in 2 weeks and haven't started pack(nuts, I know).  Then my MacBook Pro died.  It was a very sad day in my apartment.  But I took it to the Genius Bar at the local Apple Store and they brought my baby back to life :)

This year I had wanted to do homemade food gifts for all my friends and family.  Well, with moving soon and work and life, I haven't gotten around to it yet.  So I will just share my homemade food gift ideas with you.  Hopefully I get around to it next year :)

Candy Cane Vodka : Sounds amazing, right?  I haven't tried it yet, but I believe it is going to be nothing less than amazing.  I did no come up with the recipe, click on the link for the original post.  Basically you put cheap vodka in a mason jar, add sugar candy(candy canes for holiday season), let sit for 2 days.  Then you have flavored vodka!  You can also make cute labels or tags to dress up the jar for to give as a gift.

Cookie Trays:  Ok, so everyone gives cookies this time of year.  But I think it is a fun thing to do.  I give cookies to co workers, office staff, and neighbors.  I make classic spritz cookies with my cookie press.  I will also add fudge to the cookie try, or other simple cookies if I have time to make them.

Ingredients: 
3 sticks butter softened
1 cup sugar
1 egg
1 tsp vanilla extract
3 1/2 cups flour
colored sugar

Start Cooking: 
1.  Pre heat oven to 375 degrees.  
2.  Beat butter and sugar on medium speed, until creamy.  Add egg and vanilla, beat well.  Add flour and mix on a low speed.  
3.  Put dough into cookie press and press the cookies onto a cookie sheet.  Sprinkle with colored sugar and bake 10-12 minutes.  Cool for 2 minutes on cookie sheet and then transfer to wire rack to cool completely.  

S'mores Kits:  
I cannot take credit for this one... I got the idea from Essen, a recreational cooking school in Lancaster PA.  I believe I have blogged about my experiences with Essen before.  But I will say it again: I love the classes and I always learn a lot of great new things.  Today I went to a make your own holiday food gift class.  We learned how to make homemade marshmallows and we got the idea to make a s'mores kit with them.  You could also make chocolate bark or chocolate spread to go with the kit.  Make your own gram crackers, or used store bought ones.  I am not a big fan of marshmallows, but these homemade ones were really great.  I will post Essen's marshmallow recipe here.  And I also encourage you to take a class with them, you won't regret it.

Ingredients: 
3 packages unflavored gelatin
1 1/2 cups granulated sugar
3/4 cups light corn syrup
1/4 cup honey
1/4 teaspoon kosher salt
1 tablespoon vanilla extract
confectioner's sugar, for dusting

Start Cooking: 
1.  Combine the gelatin and 1/2 cup cold water in the bowl of an electric mixer fitted with the whisk attachment and allow to sit while you make the syrup.
2.  Meanwhile, combine the sugar, corn syrup, homey, salt and 1/2 cup water in a small saucepan and cook over medium heat until the sugar dissolves.  Raise the heat to high and cook until the syrup reaches 240 degrees on a candy thermometer.  Remove from heat.  
3.  With the mixer on a low speed, slowly pour the sugar syrup into the dissolved gelatin.  Put the mixer on high speed and whip until the mixture is very thick, about 15 minutes(yes, it really does take that long).  Add the vanilla and mix. 
4.  With a sieve, generously dust an 11 x 7 inch baking dish with confectioners sugar.  Pour marshmallow mixture into the pan, smooth top, and dust with more sugar.  Allow to stand uncovered 2-3 hours, or over night. 
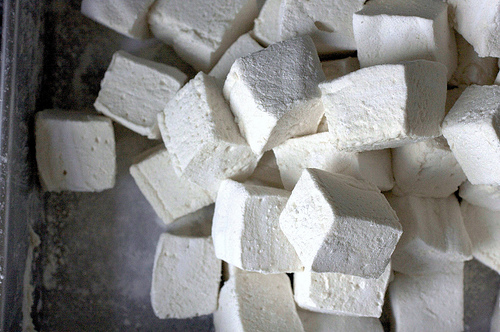
5.  Turn the marshmallows onto a board and cut them in squares.  Dust them with more sugar(so the sides are not sticky).  

Well, those are my ideas for DIY holiday food gifts.  Please share your DIY holiday food ideas!  

Enjoy!  

Friday, December 9, 2011

Pumpkin Cookies

Ok, so I really love pumpkin.  But I don't like pumpkin pie, it's too mushy.  I also love chocolate.  At a bake sale a few years ago I tried pumpkin chocolate chip cookies for the first time and they were amazing.  Not sure why I waited until now to try making them for myself.   Yes, pumpkin is normally a fall food.  But I figured since we are having warm weather here, why not make some pumpkin treats in december?  I browsed a bunch of websites and cook books and found a recipe that I liked online.  I added a few things to it though.  I will post my version of the recipe here.  Warning: this recipe makes a TON of cookies.

Ingredients: 
4 cups all purpose flour
2 cups sugar
2 teaspoons ground cinnamon
1 teaspoon pumpkin pice spice
1 teaspoon salt
1 can(15 or 16 ounce) pumpkin
1 cup vegetable oil
2 eggs
2 tablespoons milk
2 tablespoons vanilla extract
2 cups chocolate chips

Start Cooking: 
1.  Heat over to 375 degrees.  Line baking sheets with parchment paper.
2.  Put all ingredients, except chocolate chips, in a large bowl and mix on medium speed until well blended.  Fold in chocolate chips.
First time using my new stand mixer!  
3.  Spoon cookies onto baking sheets.  Bake for about 12-13 minutes, until edges begin to brown.  

finished cookies!  
4.  Cool for a minute on the baking sheet then transfer to wire rack to finish cooling.  Store in air tight container.  

Tips and Hints:
1.  Do not over bake; the cookies will turn out dry and hard(icky).  
2.  Why line the baking sheets with parchment paper?  The cookies will not stick and it makes clean up easier.  

Enjoy! 

Sunday, December 4, 2011

Easy Stromboli

We all know that I love Italian food.  I also love simple easy cooking.  I was browsing Pinterest and found a recipe for stromboli.  It looked really yummy and easy to make, but I didn't like all the ingredients they used.  So I made my own version.  The best thing about this recipe is that you can add whatever ingredients you want.  I will give you the ingredients that I used, feel free to adjust as you like.

Ingredients:
vegetable oil
1 medium, chopped
1 green pepper, chopped
Italian seasoning
traditional spaghetti sauce
shredded mozzarella cheese
refrigerated pizza dough, in the tube

Start Cooking:
1.  Pre heat oven to 350 degrees.  Line cookie sheet with parchment paper.
2.  Roll out pizza dough into a large rectangle and place on cookie sheet.
3.  In a medium sauce pan, heat the oil and Italian seasoning.  Add the onions and peppers and cook until they are tender.
4.  Spread a thin layer of spaghetti sauce on the middle of the pizza dough.  Layer the onions and peppers on top of the sauce.  Then layer the cheese, topping it off with a little more sauce.

5.  Fold over the sides of the dough, covering up all the toppings.
6.  Bake until the dough is cooked, about 20 minutes.
7.  Let stand for 5-10 minutes before cutting.  If you cut it before, the cheese and everything will run out.

Enjoy!

Saturday, November 26, 2011

Thanksgiving Favorites

First off, I am very sorry to say that I totally forgot to take pictures for this recipe and post, so sorry!  However, I will be making this recipe again soon and I will make sure to take pictures and post then.

My favorite foods to eat at Thanksgiving are my mom's mashed potatoes and Yaya's(my grandmother) pumpkin bread.  Yaya is getting old and lives in a retirement community now.  She has a very small kitchen and does not bake much anymore.  So she isn't making the pumpkin bread any more, my favorite part of Thanksgiving.  Since I have a pretty nice kitchen, I decided to make the pumpkin bread this year.  I called up Yaya and got the recipe from her.  I tried to do it exactly like she makes it and I think I made her day by asking for her recipe.  Yaya has been making this bread since my dad was little.  She said she got the recipe from her neighbor when they lived down at the shore.

Ingredients: 
2 cups pumpkin
1 cup salad oil ("Yaya, what the heck is salad oil?"  "oh you know, canola oil")
3 cups white sugar
4 eggs
3 1/4 cups all purpose unbleached flour
1 teaspoon baking powder
1 teaspoon baking soda
1 teaspoon ground cloves
1 teaspoon nutmeg
2 teaspoons salt (Yaya uses more like 1 1/2 teaspoons)
1 teaspoon cinnamon

Start Cooking:
1.  Grease and flour 2 loaf pans.  One batch will make 2 loafs.  Yaya uses Crisco to grease the pans.  DO NOT use the spray stuff.  Pre heat oven to 350.
2. In a large bowl, beat the eggs.  Mix in the sugar, pumpkin, and salad oil.  Then all remaining ingredients and mix well.
3.  Dived the batter between the 2 loaf pans.  Bake for 1 hour.  Yaya said in her old oven, it took about 1 hour 15 minutes.  In mine it took about 1 hour 5 minutes.  Check at one hour, and cook longer if needed.  Check using the knife test.

Tips and Hints:
1.  When serving, sprinkle some powdered sugar onto of the bread.  Looks nice and tastes yummy.
2.  That's really it.  The recipe is super simple, but super yummy.

Enjoy!  

Friday, November 4, 2011

Nutella Hot Chocolate

This is probably the easiest recipe ever, and the yummiest recipe ever.  I am not a big fan of milk, I hardly ever drink it.  But they say I'm supposed to drink lots of it for the calcium and all that good stuff.  Nevertheless, I never drink milk.  But I LOVE hot chocolate.  I just discovered a recipe for hot chocolate made with Nutella.  I found the recipe on Pinterest, and I'm not really sure where it started.
All you need is 1 cup of milk and 2 spoonfuls of Nutella
so simple, just 2 ingredients 
In a small sauce pan, add the milk and Nutella.  Cook on medium heat, stirring with a whisk, until hot and the Nutella is incorporated throughout the milk.  


Enjoy!


Friday, October 21, 2011

Apples!

When I think of fall, I always think of Apples.  I like to eat apples as a snack and I also like to cook or bake with them.  Today, I went to lunch with a friend at Brown's and picked up a 1/2 peck of apples when I was there.  Brown's is a farm market and cafe in York County, PA.  They grow their own apples and offer pick your own.  Remember, No farms, No food!
Apple at Brown's

When I got home with all the apples, I pulled out a few cook books and went in search of a breakfast recipe using muffins.  I found a simple recipe for apple muffins in the Joy Of Cooking book.  I adjusted the recipe a little, adding vanilla extract, and taking out the nuts.  

Ingredients:
1 1/2 cups all purpose flour
2 teaspoons baking powder
1 teaspoon baking soda
1/2 teaspoon salt
1 1/2 teaspoon ground cinnamon
2 large eggs
3/4 cup sugar
1 1/2 cups chopped apples 
5 tablespoons of butter, melted
1/2 chopped nuts, optional 

Start Cooking: 
1.  In a large bowl, mix flour, baking powder, baking soda, and cinnamon in a large bowl.  In another bowl mix eggs, sugar, apples, and butter.  Add nuts if you want.  
2.  Pour the two bowls together, and fold until mixed.  
3.  Pour into greased muffin tins, about 12 muffins.  Bake at 400 degrees for about 14-16 minutes.  Let cool a for about 3 minutes in the tins and then cool on cooling rack.  

Tips and Hints:
1.  Serve warm, with butter.  
2.  Keep in the fridge so they last longer.  

Enjoy!  


Tuesday, October 18, 2011

Homemade Tomato Sauce

Well, it's semi homemade.  I'm all for easy, but yummy, cooking.  I wanted to make my own tomato sauce. I wanted to be able to add my own flavors, and have it just the way I like it.  But I did NOT want to be cooking and stirring all day.  So I came up with an easy, fast recipe for a simple sauce.  I use canned tomatoes that are already peeled, so I don't have to spend the extra time peeling fresh tomatoes.

Ingredients:
1 large can peeled Italian style plum tomatoes
garlic
onion
olive oil
salt and pepper
seasonings

Start Cooking:
1.  Finely chop the garlic and the onion.  I normally use 3/4 of a white onion and 2-3 garlic cloves.  You can adjust to your own taste.   Heat about 2 tablespoons of olive oil in the bottom of a sauce pan.  Add the chopped garlic and onion and a little salt.  Cook until translucent, almost browned.
About half way through the cooking process for the onion and garlic. 
2.  Add the entire can of tomatoes, do not drain.  Use a potato masher to mash tomatoes to desired thickness.  You can leave it chunkier or make it smoother.  Add salt and pepper to taste.  Add other seasonings to taste.  I normally add basil and oregano, to taste.  

3.  Let cook on low heat for about 30 minutes.  This will thicken the sauce and give it a great flavor.  


Tips and Hints:
1.  I use a hand held chopper to chop the onion and garlic.  It goes a lot faster and I don't cry as much with the onions.  
2.  Once your sauce is done, store in the fridge in containers, freeze it, can it, whatever you want.  

Enjoy!  


Tuesday, October 4, 2011

Expanding

I would like to expand my blog to other parts of the kitchen, not just recipes.  I love to share recipes, but I would also like to share other things from the kitchen.
My birthday is tomorrow and my grandmother gave me an early birthday present.
Yaya got me these super cute kitty bowls!  I LOVE them!  I got a set of 2 bowls and they are the perfect size for cereal, soup, pasta, ice cream, whatever you like.  and they are really cute!  

What are you favorite kitchen items that are cute but not really practical?  You know we all have them ;)

Sunday, October 2, 2011

Strawberries!

Ok, so I know it's waaaaay past strawberry season and this post is really late.  And I also haven't posted in a long time.  I really am trying to be more regular with my blogging.  Momma A always said to  write up a bunch of posts ahead of time and then post them so many times a week; I think I will try this approach, might help me be more consistent with it.
Anyways, back in strawberry season, my mom and I went to Raab Fruit Farms in Dallastown, PA.  You can access their info through this link, or you can also find them on Facebook, but their page is rather new and does not have a lot of info on it.  We did the pick your own strawberries and it was great.  The staff was very friendly and the berries were yummy.  You all know how I love local farms and pick your own.  you can get a lot of product for less money and you are supporting local farming and business.  Remember: "No farms, No food!"

I picked about 8 quarts of berries and there was no way I could eat them all before they went bad, so I made strawberry jam with them.  I learned how to make jam with Essen, "a recreational cooking school based in Lancaster, PA."  Essen offers a wide variety of classes and I always learn a lot of great foodie info while there.  I will share the recipe for strawberry jam that I learned with Essen.  After you make the jam, you can can it, freeze it, or put it in the fridge and eat within a month.

Strawberry Jam


Ingredients:
3 quarts strawberries, hulled and cut in half or quarters, depending on how big the berries are
2 1/4 - 3 cups sugar
3 tablespoons lemon juice

Start Cooking:
1.  Combine fruit, sugar, and lemon juice in a large bowl.  Let stand at room temperature for 2 hours, or refrigerate overnight, stirring occasionally.
2. Transfer fruit mixture to a saucepan and bring to a boil over medium-high heat, skimming the foam and stirring occasionally.  Mash to think puree with back of spoon.  Reduce heat to medium-low and boil gently, until mixture begins to thicken, stirring often, about 30-60 minutes.  Keep skimming foam.
Berries cooking, waiting for the boil.

3.  Once your jam is thickened into jam, can it, freeze it, or refrigerate it.

Tips and Hints:
1.  Watch your jam!!!  I left the jam for about 20 minutes and ended up burning a batch.  Burn jam does not smell to taste good.
2.  Why skim the foam?  It helps keep the jam from getting cloudy.

Enjoy!


Wednesday, August 3, 2011

Peaches!

I love finding local farms and supporting local farming in my community.  The other day I saw a bumper sticker that said: "No farms, No food."  Very true, right?  So why not support local farming?  Local food is typically cheaper because it doesn't have to be transported far distances to get to your grocery store(better for the environment too).  Supporting local farming can also support local jobs.
I also love pick your own fruits and veggies- what's better than getting your produce right off the plant?  It's the best way to know how fresh your food is.  I have found a great farm market in my community.  Flinchbaugh's Orchard in Hellam, York County, PA is my new favorite place.  They have great events for kids and families.  I recently went to their Summer Peach Fest with one of the kids I work with, and we had a blast!  Flinchbaugh's also does school and adult class tours of their farm.  While I was there, I did their pick your own peaches.  The staff was all very helpful and friendly.  They charged $1.25 per pound of pick your own peaches.  They provide bags for your picked peaches.
After having all these peaches, I wasn't really sure what to do with all of them.  I wanted something yummy for breakfast to have on hand for the week.  I got online and found some cobbler recipes(cobbler is ok for breakfast as long as I don't eat it with ice cream, right?).  I sort of combined a few different recipes to make my own.

Breakfast Peach Cobbler


Ingredients:
Peaches, peeled a sliced
1/2 cup butter, melted
1 1/4 cup sugar, reserve 1/4 cup
1 cup all purpose flour
1 cup milk
2 teaspoons baking powder
1/4 teaspoon salt
1 tablespoon cinnamon

Start Cooking:
1.  Peel and slice your peaches.  It is really up to you have many peaches you want to use.  2-3 cups of the peeled and sliced peaches is a good amount to shoot for.  Put the peaches, 1/8 cups sugar and 1 tablespoon cinnamon in a large pot on the stove and bring to a boil.  The sugar and heat will bring out all the juice from the peaches.
2.  Melt the butter and pour into the bottom on a shallow baking dish.  Then pour the hot peaches over the butter.
3.  In a large bowl, mix together the remaining ingredients(only use 1 cup of sugar, reserve the remaining 1/8 cup).   Then pour the batter over the peaches.  Sprinkle the remaining sugar on top of the batter.  Bake at 400 degrees for about 35 minutes, until cake is done and top is golden brown.  Serve warm.


Enjoy!


Tuesday, April 26, 2011

Cupcakes

I am a little embarrassed to say that I have never made cupcakes or cake from scratch.  I've always used a box mix; it's just easier.  And they taste good, so why bother with baking from scratch?  I am hosting a girls day in a few weeks, and I have decided to serve cupcakes.  I made this incredibly cute cupcake platter at The Pottery Works in Lancaster, PA.

So do I make cupcakes from scratch?  Or do I stick with my regular box mix?  

Sunday, April 17, 2011

Mint Chocolate Chunk Cookies

I love mint, it's a very refreshing flavor that makes me think of spring.  I also love mint and chocolate together and I love cookies.  So why not put them together!? What I came up with was yummy mint chocolate chunk cookies made from scratch.  It's so easy to just make cookies or other baked good from a box or mix, but this recipe is really easy, almost as easy as cooking from a box.

Ingredients:
2 1/4 cups white flour
1 teaspoon baking soda
1 teaspoon salt
2 sticks butter(1 cup), room temp
3/4 cup white sugar
3/4 cup brown sugar, packed
1 teaspoon vanilla extract
2 large eggs
1 3/4 Andes chocolate mints, or any other brand, broken or cut into chunks

Start Cooking:
1.  Pre heat oven to 375 degrees.
2.  Using a stand mixer or hand held electric mixer, cream together butter, white sugar, brown sugar, and vanilla extract.  Then add eggs one at a time, making sure they are well mixed in with the butter and sugars.
3.  In another bowl, stir together flour, baking soda and salt.  Slowly add the flour mixture to butter mixture, using the electric mixer to combine.  Once all the flour is mixed in, use a rubber scraper to fold in the mint chocolate chunks.
4.  Spoon onto cookie sheets, or use a cookie scoop.
5.  Bake for 9-11 minutes.  Remove from oven and let cook on cookie sheet for 1 minute.  Then transfer to cooling racks.  Store in air tight container.

Tips and Hints:
1.  before chopping up the chocolate mints, put them in the fridge for about an hour.  It will make them cold and easier to handle(they won't melt while handling them!).  
2.  serve the cookies while warm, or heat for a few seconds in the microwave. Yummy!

Enjoy!

Friday, April 15, 2011

One Pot Meal

I love cooking, we all know that.  I love finding recipes, trying new foods, and sharing my findings.  But I hate cleaning up after cooking.  I hate dishes, and cooking creates lots of dishes.  So I set out to make a healthy complete one pot meal.  What I came up with was a pasta dish, all cooked in one pot.

Ingredients:
pasta, any style you like or have on hand
veggie chicken strips(or real chicken if you eat meat)
frozen veggies
tomato sauce
Italian seasoning to taste

Start Cooking:
1.  Use a large skillet with high sides and a lid.  Put pasta and enough water to cook the pasta in the large skillet.  Bring to a boil and cook until just under cooked.  Drain out extra water. Remove pasta from skillet.
2.  Add chicken to skillet and cook until done.  Then add the pasta back to the skillet.  Add tomato sauce, and frozen veggies.  Cover and cook until veggies are cooked and entire meal is cooked through.  Season to taste.  Serve with grated cheese, to taste.


Tips and Hints:
1.  Don't like chicken?  Or have another meat on hand?  Substitute ground beef, sausage, or other meats for the chicken.  
2.  This is a great meal to make up a big batch and serve a lot of people or have leftovers. 

Enjoy!

Sunday, April 3, 2011

I'm renovating!

Well, I guess I should say my uncle is renovating.  And I'm helping, or trying to at least.  We are working on screening in my porch.  This project is proving to be a lot harder than I thought it would be, or at least a lot more work than I thought.  We worked for a few hours today and are about half way done.  My uncle will be coming back in a few weeks to help finish the project.
The screen is kind of hard to see in the picture, but it goes until the last unpainted poll on the right of the picture.  Our first panel was our worst, but we got it down by the third panel!
I'm looking forward to bug free meals on my new porch for the summer!

Monday, March 28, 2011

multi tasking, not my strong point

Lots to update on today, and I guess I should really break this up into a few posts.  But I'm really trying to work on my multi tasking skills.
First, my first attempt at making pasta:  semi-success!  I say only semi because I made it in a class, not on my own.  But I feel comfortable making homemade pasta on my own.  It's a little time consuming, not as fast as dumping store bought pasta out of a box.  Your time really does pay off; the pasta is super yummy!  I will be attempting to make the pasta on my own and will share with you later.
Second, a new book in a new life:  Momma A lent me the book The Girl With The Dragon Tattoo, by Steig Larsson a few months ago.  Momma A blogged about this book here.  After she gave it to me, it went on my over flowing bookshelf and I forgot about it.  I have been doing some spring cleaning and found the book.  I have been reading it for about a week now and I love it, it's a great read.  Momma A had said that her oldest son would enjoy the book also; I'm not so sure if he would enjoy the book, not like the other books he normally reads, but I will be sure to pass it along to him just the same.
Oh and more multi tasking:  I'm also watching my new favorite show, Harry's Law.  What are your favorite tv shows of the moment?

Sunday, March 27, 2011

Something New

Two months have passed since Momma A passed.  As with this whole journey, I have very mixed emotions today; conflicting emotions.  I find it interesting that I am taking a cooking class today to learn something I've never made before.  A new beginning in my kitchen and also a new beginning in my life without Momma A.  
Today I am taking a cooking class with Essen, a "recreational cooking school" in Lancaster, PA.  I have taken a bunch of cooking classes with Essen over the past 2 years or so and I have loved each class.  Today I am taking a class on homemade pasta.  As many of you know, I LOVE pasta.  I eat it a few times a week.  But I have never made my own.  I've always been afraid to make it.  Have you ever been afraid to try and make something new?  I've been afraid to make something new in my life without Momma A and afraid to make something new in my kitchen.  So today is all about something new for me.  
I'll let you all know how to homemade pasta goes!   

I'll be having a drink for you, Momma A ;) 

Friday, March 25, 2011

Applesauce Muffins

It's been a little while since I've cooked from my Deceptively Delicious cookbook by Jessica Seinfeld.  Months ago, I made up a ton of veggie purees and froze them.  My freezer is filled with them.  Why not use some of it?!  So I decided on Applesauce Muffins with carrot puree.  I know, it sounds really weird.  But they turned out really well and the carrot is not the dominating flavor, but seems to just give the muffins a little extra sweetness.  The recipe makes 12 muffins, way more than I can eat by myself before they go bad.  So I gave half to my mom.  Later that evening, after giving my mom the muffins, I got a text saying "Wow, excellent muffins!  Thanks for sharing."  So now I will share with everyone else.  Recipe take directly from Deceptively Delicious.

Ingredients:


Topping:
3/4 cup old fashioned oats
1/4 cup firmly packed light or dark brown sugar
1 teaspoon cinnamon
2 tablespoons butter, melted(original recipe calls for trans fat free margarine, but I prefer to use real butter when baking)

Batter:
1 1/2 cups all purpose flour
1 cup old fashioned oats
1 teaspoon baking powder
1/2 teaspoon baking soda
1/2 teaspoon cinnamon
1 cup applesauce
1/2 cup milk
1/2 cup carrot puree(see previous blog post on purees for directions)
1/2 cup firmly packed light or dark brown sugar
1/4 cup vegetable or canola oil
1 egg

Start cooking:
1.  Preheat oven to 400 degrees F.  Coat a 12-cup muffin tin(or 2 6-cup tins) with cooking spray or live with paper baking cups.
2.  To make the topping, stir together the oats, sugar and cinnamon in a bowl.  Stir in the margarine(or butter).
3.  To make the batter, combine flour, oats, baking powder, baking soda and cinnamon in a large mixing bowl and stir to mix.  In a second bowl, mix the applesauce with the milk, puree, sugar, oil, and egg with a wooden spoon.  Add the flour mixture slowly, stirring until just moistened.  Do not over mix- the batter is supposed to be lumpy.
4.  Divide the batter evenly among the muffin cups and sprinkle with the streusel topping.  Bake until the topping is lightly browned and a toothpick comes out clean when inserted into the center of the muffins, 18-20 minutes.  Turn the muffins out onto a rack and serve warm.


Tips and Hints:
1.  Store muffins in the fridge, they will keep longer.  Reheat for about 20 seconds in the microwave.  
2.  DO NOT OVER MIX THE BATTER!  whenever making muffins or bread, never over mix.  The end result will be tough and not as moist.  
3.  I didn't freeze my left over muffins, I passed them along to my mom.  If you don't have someone to pass the muffins along to, try freezing them.  I would love to know how that turns out :)

Enjoy!  

Saturday, March 19, 2011

Spring Cleaning

I'm starting to settle into my new life; new routines, new patterns.  Money is a little tight now, as always, but I feel the need to be more mindful of saving money.  My cupboards are full, so I decided that a good way to cut back on costs would be to use up everything I have before I buy more food stuff, except for fresh things(milk, eggs, bread, fruit...).  So I went through everything and found that I have tons of potatoes, all still good and ready to be cooked.  I ended up making a big batch of Cheesy Baked Mashed Potatoes.  Now to get started on the rest of my spring cleaning....

Cheesy Baked Mashed Potatoes
Ingredients:
potatoes, amount depends on how big a batch you want to make
1 cup frozen cauliflower
butter
milk
oregano
garlic salt
cheese, whichever kind you like or have on hand

Start Cooking:
1.  Chop potatoes into small pieces(the smaller the pieces, the faster it will cook!)  Put the potatoes and cauliflower in a large pot and boil until tender.  Time varies depending on amount of potatoes.
2.  Drain potatoes and cauliflower, then return to pot.  Add milk and butter and mash with a potato masher.  You can add however much milk and butter you like, depending on how creamy you want your potatoes to be.  Once the potatoes and cauliflower are mashed, add oregano and garlic salt to taste.  Add cheese to taste.  Mix well.
3.  Put potatoes mixture in a greased baking dish and bake in a 350 degree oven until golden brown on top.

Tips and Hints:
1.  Why cauliflower?  This is a trick I picked up from the Deceptively Delicious cookbook by Jessica Seinfeld.  The cauliflower adds nutrients and you can't even taste it in with the potatoes.
2.  I love cheese.  I added some cheddar cheese, mozzarella cheese, and parmesan cheese.  You can really add whatever cheese you like or have on hand.


Enjoy!

Friday, March 18, 2011

comfort food

Still missing momma a so much.  trying to find my way without her, without anyone.  i've been trying to find comfort in the little things.  I've always loved Italian food, and lasagna is one of my favorites.

Ingredients:
lasagna noodles
ricotta cheese
mozzarella cheese
1 egg
pasta sauce
tomato paste
Italian seasoning

Start Cooking:
1.  Cook the lasagna noodles as directed on the box.  Drain and rinse with cold water.
2.  In a medium bowl, mix the ricotta cheese, mozzarella cheese, 1 egg and italian seasoning until it is well combined.
3.  In another bowl mix the pasta sauce with a few table spoons of tomato paste.
4.  Spread enough of the tomato sauce mixture on the bottom of a baking dish to thinly cover the bottom.  Then place a layer of cooked noodles.  Spread some of the cheese mixture, then cover with a layer of sauce and noodles.   Continue layering until you reach the top or the baking dish.
5.  Bake in a 350 degree oven for about 40 minutes, until lightly browned on top.

Tips and Hints:
1. I place my baking dish on a cookie sheet.  It's easier to lift and incase anything spills over, it won't get the oven dirty :)
2.  I normally serve my lasagna with salad or cooked veggies.  If you like, you can put veggies in your lasagna.  I do not eat meat, but you can add meat if you like.  Just brown some ground beef in a fry pan and layer with the cheese in the lasagna.

Enjoy!

Sunday, March 13, 2011

update

It has been months since I last posted.  My entire life has changed.  Momma A past away the end on January.  Life just hasn't been the same without her here.  My boyfriend of almost a year and a half and I have broken up.  I've been morning the loss of my momma and my love.  I am finally starting to move along and get one with life.  I have decided to live life for me.  I now have 2 African Claw Frogs in my family, who have yet to me named(I've only had them about a week, and I am still searching for the perfect names).  I have been cooking the food that I love.  I started going to yoga again.  I know life will never be the same without momma a, but I can try and make it the best life it can be.

One of the recipes that I made is my version of Vegetarian Chili


Ingredients: 
1 medium onion, chopped
carrots, chopped
white rice
kidney beans
1 can diced tomatoes
a few tablespoons tomato paste
frozen corn
chili seasoning, to taste
1/2 cup water

Directions:
1.  This recipe is all about chili the way I like it, so feel free to play around with it.  I like lots of rice in my chili and I don't like it really soupy.  I also don't like it very spicy.  You can adjust the recipe to your own taste.
2. Cook about 1/2 cup(dry) white rice.  Meanwhile, cook the chopped onions and carrots in a small sauce pan over medium heat until they are tender.
3. In a large pot, or your crock pot, combine all ingredients.  Stir so everything is well mixed and cook over medium heat until everything is heated through.
4. Serve warm with shredded cheese on top.

Tips and Hints:
1.  I always make a big batch so I have left overs.  The left overs also freeze very well.